Stop Heel Slip: 2pcs Heel Cushion Pads That Prevent Blisters
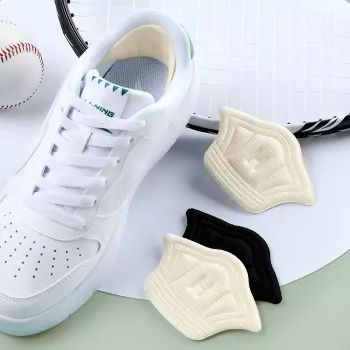
Softer heels, steadier steps: why small pads can change your whole shoe day
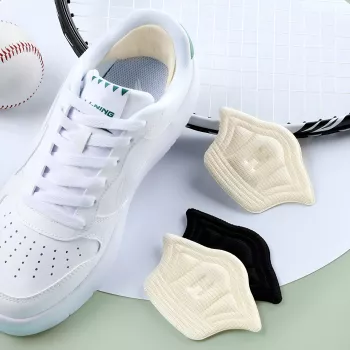
Shoes that almost fit can still ruin a day—heels that slip, stiff backs that rub, and that one spot that always turns into a blister. Heel cushion pads are a small add-on that can make a real difference by adding gentle padding right where the shoe meets the back of your foot. Our team put together this practical guide so you can decide when 2pcs heel cushion pads for shoes make sense, apply them neatly, and get a more comfortable fit without changing your shoes. For more guidance, see Materials and Structures Inspired by Human Heel Pads … – PMC.
If you’re ready to try a quick fix, you can find our 2pcs Heel Cushion Pads for Shoes in stock now. For further reading, see Effectiveness of mechanical treatment with customized insole ….
When heel cushion pads help the most
Heel cushions work best when your shoes are close to right, but the heel area needs just a little help. Here are the situations where you’ll feel the biggest payoff:
- Heels that lift while walking: Pads add a bit of grip and fill minor extra space at the back of the shoe.
- New shoes with a stiff heel counter: They create a softer contact point to reduce rubbing during break-in.
- Shoes that fit in length but feel loose at the heel: They stabilize your foot without squeezing your toes.
- Seasonal fit changes (bare feet vs. socks/tights): A thin cushion layer helps when shoes feel slightly roomier.
- High-use pairs that start to feel “broken in” a little too much: They restore a snug heel feel without replacing the shoes.
Quick comfort map: match the problem to the fix
| What’s happening | What heel cushion pads can do | Best tip |
|---|---|---|
| Heel slips up and down | Reduces extra space and adds friction | Apply centered and press firmly along the edges |
| Blisters forming at the back of the heel | Creates a softer barrier to reduce rubbing | Use from day one on new shoes to prevent hot spots |
| Shoe feels fine standing, painful walking | Stabilizes heel to reduce repeated rubbing cycles | Pair with thicker socks for the first few wears if needed |
| One shoe fits looser than the other | Balances the fit by adding padding on the looser side | Start with one pad, then adjust alignment rather than stacking |
| Back of shoe is stiff and abrasive | Softens contact area until the shoe breaks in | Keep pads in place for several wears, then reassess |
What makes a good “almost-invisible” fit upgrade
A heel cushion pad should feel like a quiet improvement, not a bulky modification. When you’re choosing and using pads, focus on:
- Targeted placement: Heel pads focus on the back-of-shoe contact point rather than changing the entire interior feel.
- Comfort-first cushioning: The goal is to soften pressure and reduce friction at the heel collar.
- A cleaner look in the shoe: A simple heel pad can be less bulky than full insoles when you only need minor tuning.
- Easy routine maintenance: If you rotate shoes, pads make it simple to refresh comfort without committing to permanent alterations.
If you’re dealing with heel blisters or hot spots, it also helps to follow general blister prevention guidance from the American Academy of Dermatology Association, especially early intervention before skin breaks down.
How to apply heel cushion pads so they stay put
Most “pad problems” come down to prep and placement. A clean, centered application makes the pad feel more natural and helps the adhesive last longer.
- Clean and dry the inside heel area: Wipe away lint, dust, and residue so the adhesive bonds well.
- Test placement before sticking: Hold the pad where your heel actually rubs—usually centered at the back and slightly above the insole line.
- Peel and press from center outward: Smooth firmly to prevent air pockets and edge lift.
- Give it time to set: Let the adhesive settle before heavy walking, especially if the lining is slick.
- Check symmetry: If you’re using pads in both shoes, place them at the same height so the feel matches step to step.
One extra comfort check: if the shoe’s heel collar is very stiff, start with shorter wear sessions even with padding. For overall shoe fit and selection fundamentals, the American Podiatric Medical Association offers helpful general guidance.
Comfort tips for different shoe types
Common mistakes (and quick fixes)
A simple add-on for everyday pairs
If you like building a small on-the-go refresh kit, our team also keeps simple grooming basics nearby; our 4 in 1 Nail Rhinestone Gel is an easy add when you want your look to stay polished from shoes to fingertips.
FAQ
Do heel cushion pads help with blisters?
Yes—by cushioning the spot that rubs, heel pads can reduce friction and help prevent blisters from forming. They work best when you apply them early, before the skin becomes irritated, and place them exactly where your heel makes contact with the shoe.
Will heel pads make shoes feel tighter?
They can feel slightly tighter at the back of the shoe because they take up a bit of space, which is helpful for minor heel slip. If the shoes already feel too tight overall, heel pads usually aren’t the right fix.
How do you keep heel cushion pads from peeling off?
Clean and fully dry the inside heel area first, then press firmly—especially along the edges—when applying the pad. Let the adhesive set before heavy walking, and avoid moisture right after application.













Leave a comment