Waterproof Mommy Backpack: Large Capacity for Travel
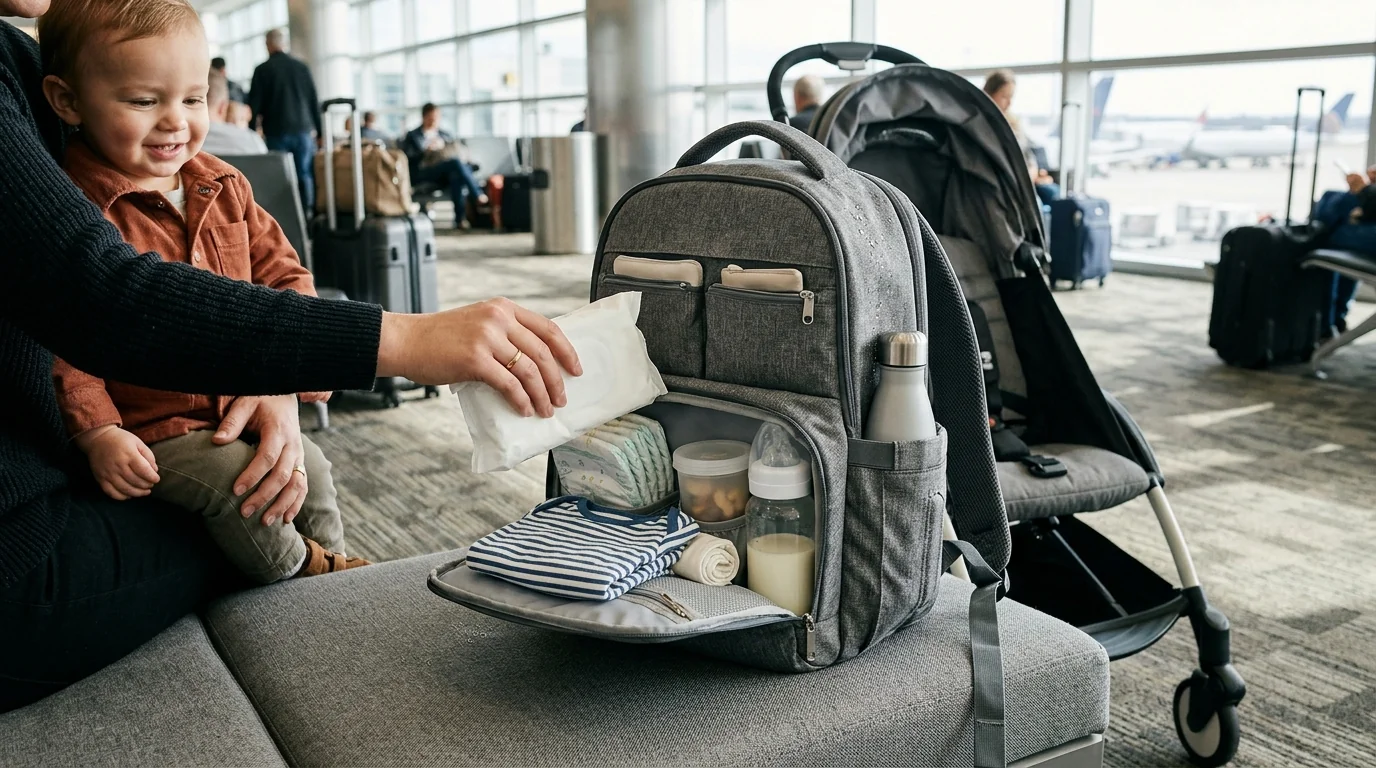
Large-Capacity Waterproof Mommy Backpack for Diaper Days and Travel
A dependable diaper backpack needs to handle messy surprises, quick changes, and long days away from home—without turning into a black hole of lost pacifiers and tangled wipes. A large-capacity waterproof mommy backpack keeps essentials organized, easy to reach, and protected from spills during everyday outings and travel.
What Makes a Diaper Backpack Work on the Go
The best diaper backpacks earn their keep by reducing friction in the moments that feel rushed: a diaper change in a tiny restroom, a snack handoff in the car, or a gate-check line with a squirmy toddler. The difference usually comes down to capacity, protection, and layout.
- Large-capacity interior: Enough space for diapers, wipes, spare outfits, feeding items, and parent essentials in one carry.
- Waterproof exterior: Helps protect contents from rain, leaks, and bottle spills.
- Hands-free carry: Backpack straps keep your hands open for holding a child, pushing a stroller, or managing luggage.
- Multiple compartments: Fewer “everything out on the bench” moments during quick changes and travel transitions.
Key Features to Look For in a Waterproof Mommy Backpack
Not all “water-resistant” bags perform the same after months of wipe-downs and daily use. Focus on materials and construction first, then the pocketing that matches your routine.
- Wipe-clean outer fabric: Waterproof or highly water-resistant material makes spills less stressful.
- Sturdy zippers and seams: Frequent open/close cycles are where weak stitching shows up fast.
- Easy-access pockets: A dedicated spot for wipes, hand sanitizer, and snacks prevents frantic digging.
- Comfort-focused straps: Padded straps and supportive back panels matter on longer days.
- Stable base: A bag that stands or sits steady is easier to use in a trunk, café, or airport seating area.
A Simple Organization System That Prevents Overpacking
Capacity is only helpful if it doesn’t invite overpacking. A simple “zones + pouches” system keeps the bag light, predictable, and fast to restock.
- Build zones: diapering, feeding, clothing, and “parent quick-grab” (wallet/keys/phone).
- Use small pouches: Group tiny items (ointment, nail file, spare pacifier) so they don’t scatter.
- Rotate weekly: Remove outgrown diapers and seasonal extras to keep weight down.
- Keep a mini refill kit: Travel wipes, diaper cream, and disposable bags make restocking quick.
Packing Zones for Day Trips vs. Travel Days
| Zone | Day Trip Essentials | Travel-Day Add-Ons |
|---|---|---|
| Diapering | Diapers, wipes, changing pad/liner, disposal bags | Extra pack of wipes, spare outfit for adult, disinfecting wipes |
| Feeding | Bottles or snacks, burp cloth, bib | Backup bottle parts, extra snacks, reusable water bottle |
| Clothing | 1–2 outfits, socks, light layer | Weather layer, swim/outerwear as needed |
| Quick-grab | Phone/keys/wallet, sanitizer, tissues | Travel documents, charger, meds |
Using the Backpack for Diaper Changes Away from Home
When the change has to happen now, a consistent routine turns chaos into a two-minute task. Set up the “sequence” so you’re not searching one-handed while trying to keep a baby safe on the table.
- Prep before opening the diaper: Pull wipes, set a clean diaper nearby, and open a disposal bag first.
- Create a barrier on public surfaces: Use a liner when possible and keep hand hygiene supplies close. The CDC’s handwashing guidance is a helpful baseline for reducing germ spread in public spaces.
- Contain soiled clothing: Use a sealed bag so odors and moisture don’t transfer to spare outfits.
- After a leak: Wipe the waterproof exterior and let the bag air out fully at home.
Helpful references: CDC — Handwashing: Clean Hands Save Lives and CDC — Cleaning and Disinfecting Your Facility.
Travel Use: Airport, Road Trips, and Weekend Stays
- Pack “first 30 minutes” items up top: Wipes, a snack, a small toy, and a spare diaper should be reachable without unzipping the whole bag.
- Keep liquids security-friendly: When flying, consolidate toiletries and baby liquids in a clear pouch for quicker screening. Review the TSA — Liquids Rule (3-1-1) before departure.
- Road trips: Store the backpack within arm’s reach so stops are faster and less stressful.
- Overnights: Add a small laundry bag and a dedicated diapering pouch so you can move supplies room-to-room without repacking.
Care Tips for Waterproof Bags and Everyday Hygiene
Large-Capacity Waterproof Mommy Backpack: Quick Overview
For families who want one bag that works for diaper days and travel days, the Large-Capacity Waterproof Mommy Backpack – Multifunctional Diaper & Travel Bag is built around three practical priorities: a roomy layout, wipe-clean waterproof protection, and compartments that help keep essentials in their place.
At-a-Glance Details
| Item | Details |
|---|---|
| Product | Large-Capacity Waterproof Mommy Backpack – Multifunctional Diaper & Travel Bag |
| Price | 44.82 USD |
| Availability | In stock |
Helpful Add-Ons for Longer Outings
- Small comfort toy for wait times: The Cute Apple House Kitten Plush – Soft Detachable Cat Plush Toy is an easy pack for calmer transitions in lines or at restaurants.
- At-home meal planning support: Great Meals, Small Budget can help simplify the week so restocking diapers, wipes, and snacks doesn’t feel like another big task.
FAQ
What should be kept in the easiest-to-reach pocket?
Keep quick-grab essentials there: wipes, one diaper, a small snack, hand sanitizer, tissues, and a pacifier. This reduces rummaging during urgent moments like sudden messes or mid-line meltdowns.
How can a diaper backpack be packed to avoid leaks and odors?
Use sealed wet bags for soiled clothing, keep feeding items separate from diapering supplies, and stash disposal bags where you can reach them fast. Wipe down spills promptly and air-dry the bag after messy days to prevent lingering odors.
Is a diaper backpack practical as a carry-on personal item?
Yes—backpack carry is hands-free and easy to manage through terminals and boarding. Use a clear pouch for liquids, keep documents and chargers in a dedicated pocket, and double-check airline personal-item size rules since they vary.












Leave a comment