4-in-1 Nail Rhinestone Gel for Long-Lasting Crystal Nails
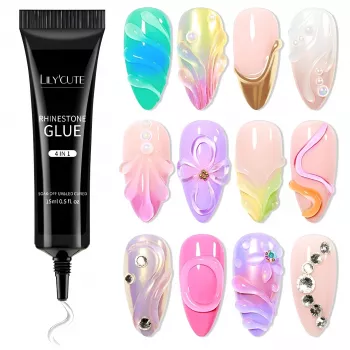
4 in 1 Nail Rhinestone Gel: Secure, Glossy, Long-Lasting Crystal Nail Designs
Rhinestones look best when they sit flat, stay put, and keep their shine through handwashing and daily wear. A 4-in-1 nail rhinestone gel is designed to grip embellishments while also helping build a smooth finish around edges—so crystal sets look clean, comfortable, and durable. Whether you love a single crystal accent or full-on jeweled clusters, the right gel technique makes the difference between “one-day cute” and a set that actually lasts. For more guidance, see Nail rhinestones – Jan-Ming Lee.
What a 4-in-1 Rhinestone Gel Does
This type of multi-use gel is made to simplify embellished nail art by combining several helpful functions in one product. Instead of layering multiple adhesives and builders, you can focus on placement and finish. For further reading, see 3D Heart Nail Crystals Charms for Glitter Gel Manicure Crafts 40 Pcs.
- Acts as an adhesive layer to anchor rhinestones, pearls, and charms to the nail surface
- Helps create a smooth “collar” around stones to reduce snagging on hair or clothing
- Can be used for small structure work (spot leveling) where needed around designs
- Supports glossy, salon-style embellished looks without constant re-application
Best Uses for Rhinestone Gel (Looks That Hold Up)
Rhinestone gel isn’t only for big, dramatic crystals. It’s especially useful for designs that need clean edges and strong adhesion in real-life wear (typing, hair washing, pockets, bags, and seatbelts).
- Single-stone accents: place one crystal near the cuticle or center for a minimalist look
- Cluster designs: arrange multiple sizes together for a dimensional “jewel” effect
- Charm placement: secure heavier pieces by building a supportive gel base underneath
- Edge sealing: add gel around the perimeter to prevent lifting and reduce snagging
- Mixed media: pair with glitter, foil, or chrome for multi-texture nail art
How to Apply for Strong Hold and Clean Edges
Durability comes from a combination of prep, the right gel amount, and a tidy seal. The goal is to lock the embellishment in place without drowning it—especially if you want maximum sparkle from faceted stones.
- Prep: cleanse and remove oils; lightly buff the surface if using over a finished manicure layer.
- Base layer: apply a small amount where the rhinestone will sit (avoid flooding the cuticle).
- Placement: pick up the stone with a wax pencil or picker and press gently into the gel.
- Seal strategically: add a thin bead of gel around the stone’s base (not over the top if sparkle clarity is important).
- Cure fully: cure according to lamp type and gel instructions; re-cure after sealing.
- Finish: if a top coat is used, keep it off the stone’s facets to preserve shine.
If a stone slides when you place it, it often means the base layer is too thin (not enough grip) or too slick (top coat residue or oils). A slightly thicker “mound” gives the piece something to settle into so it stays centered.
Quick Guide: Matching Gel Use to Rhinestone Size and Weight
Different embellishments behave differently. Tiny crystals need precision; heavier charms need support. Use the guide below to adjust gel amount and sealing so your design feels smooth and secure.
Recommended Application Approach by Embellishment Type
| Embellishment | Gel amount | Placement tip | Sealing tip |
|---|---|---|---|
| Micro crystals (very small) | Tiny dot | Set into gel, minimal pressure | Thin ring around base only |
| Standard rhinestones | Small mound | Center stone so it sits flat | Seal 360° around edges |
| Large crystals | Medium mound (supportive base) | Press to level; avoid sliding | Reinforce perimeter; re-cure |
| Metal charms | Medium-to-thick base | Anchor with a stable gel “bed” | Build a collar to reduce snagging |
| Pearls/beads | Small-to-medium mound | Place carefully to avoid rolling | Seal around base for durability |
- If stones pop off: increase prep, reduce oils, and cure longer; avoid touching adhesive spots with fingers.
- If designs snag: add a smoother perimeter seal and keep clusters away from the free edge.
Care Tips to Keep Rhinestones On Longer
Even perfectly applied crystals can loosen early if they’re stressed during the first day or constantly exposed to soaking and chemicals. A few simple habits help protect the set.
Safety Notes for UV/LED Curing
- Follow curing times recommended for the gel and lamp type; under-curing can reduce wear and durability.
- Avoid skin contact; remove excess gel before curing to reduce irritation risk.
- If sensitivity occurs, discontinue use and consider professional guidance.
- Consider sun protection for hands if frequently using UV nail lamps, especially for long sessions (see the American Academy of Dermatology Association guidance on UV nail lamps).
For broader cosmetic safety considerations and labeling awareness, the U.S. Food & Drug Administration nail care resource is also helpful.
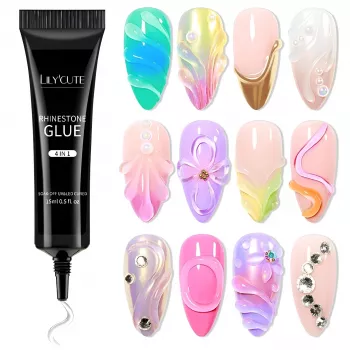
Product Spotlight: 4 in 1 Nail Rhinestone Gel
- 4 in 1 Nail Rhinestone Gel (in stock)
- Cute Apple House Kitten Plush – Soft Detachable Cat Plush Toy (in stock)
FAQ
Do rhinestones need a top coat over them?
Not necessarily. Sealing around the base improves durability, but painting top coat over the facets can dull the sparkle. For the clearest shine, seal the perimeter with gel and keep top coat off the stone surface.
Why do my rhinestones pop off after a day or two?
The most common causes are oily prep, too little gel under the stone, under-curing, or placing crystals where they snag (especially near the free edge). Improve cleansing/dehydration, use a slightly thicker base for larger pieces, cure fully, and add a smooth 360° seal around the edges.
Can rhinestone gel be used with charms and pearls?
Yes. Heavier pieces usually need a supportive “pillow” of gel underneath plus a reinforced collar around the perimeter, then a full cure (and often a re-cure after sealing) to lock everything down.











Leave a comment