30,000 lb Tow Strap + 44,092 lb Shackles: Recovery Kit
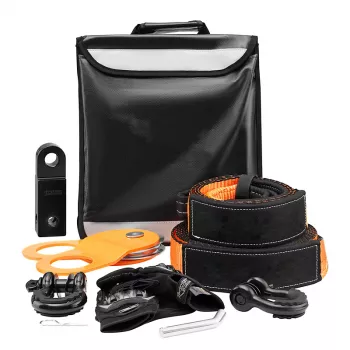
Off-Road Winch Recovery Kit with 30,000 lbs Tow Straps and 44,092 lbs D-Ring Shackles
A dependable recovery setup pairs strong ratings with practical, trail-ready hardware. This kit centers on a 30,000 lbs tow strap and heavy-duty 44,092 lbs D-ring shackles to help handle common recovery situations like mud, sand, snow, and uneven terrain while keeping connections secure and predictable. For more guidance, see Lets discuss off road recovery gear.
What the Kit Is Built For
- Vehicle recovery scenarios where a reliable connection point and strong strap matter more than speed.
- Winch-assisted pulls, short-distance extraction, and controlled towing on trails (not a replacement for on-road towing gear).
- Reducing improvised hookups that can damage bumpers, tie-down points, or suspension components.
- Supporting common off-road rigs (SUVs, trucks, UTVs) when used with appropriate rated recovery points.
If the goal is to get unstuck with as little drama as possible, a properly rated strap and correctly loaded shackles help keep the recovery controlled—especially when the terrain is unpredictable and traction changes by the foot. For further reading, see AUTMATCH 3/4″ D Ring Shackles with Winch Snatch Block ….
What’s Included and How Each Piece Works
- 30,000 lbs tow strap: the primary load path for pulling; typically used between two vehicles or between a winch line extension and an anchor setup (as appropriate to the strap type).
- 44,092 lbs D-ring shackles: used to connect strap loops to recovery points, receiver hitch recovery blocks, or recovery rings; helps keep connections aligned and reduces odd-angle loading.
- How the system comes together: strap loop seated in shackle bow, pin fully threaded and backed off slightly (where appropriate) for easier removal after load.
- Why ratings matter: strap and shackle ratings should match the weakest link in the system (recovery point, hitch insert, winch line, etc.).
Component overview
| Component | Rating / spec | Typical role in recovery | Quick check before use |
|---|---|---|---|
| Tow strap | 30,000 lbs | Pulling and controlled towing between rated points | Inspect for cuts, fraying, melted fibers, or damaged stitching |
| D-ring shackles | 44,092 lbs | Connecting strap loops to recovery points/hardware | Check for deformation, cracks, pin thread damage, and smooth seating |
Safe Setup: Ratings, Angles, and Connection Points
- Use only rated recovery points: frame-mounted hooks, recovery eyes, properly rated hitch recovery points; avoid tow balls for recovery pulls.
- Keep pulls as straight as possible: side-loading a shackle or pulling at sharp angles can reduce effective strength and increase risk.
- Match hardware: ensure the shackle size fits the recovery point hole/slot without forcing; avoid loading on the shackle pin if the bow can take the load more evenly.
- Pin handling: hand-tighten the shackle pin; avoid using cheater bars; re-check after initial tensioning.
- Add protection: use a winch line damper or weighted blanket on tensioned lines where appropriate; keep spectators well away from the line of pull.
Even with high-rated components, recovery is only as safe as the overall system. That means respecting the weakest link, minimizing odd angles, and maintaining a wide safety zone. For additional recovery safety basics, see guidance from American Automobile Association (AAA).
Common Recovery Scenarios and How the Kit Helps
Mud extraction
Mud recovery rewards patience. Apply slow, steady tension and avoid shock loading; if possible, clear packed mud away from the tires and axles to reduce the force required. A properly connected tow strap and shackles help keep the pull clean and direct instead of twisting and binding.
Sand recovery
In sand, technique often beats horsepower. Lowering tire pressure (when appropriate), choosing a straight pull line, and using gentle tension can prevent a deeper dig. A secure shackle-to-strap connection helps the recovery team focus on traction and alignment rather than worrying about slipping hooks or improvised attachments.
Snow and ice
On snow, traction changes quickly. Prioritize traction aids and controlled pull; avoid sudden jerks that can break traction loose and spike loads. Consistent, predictable tension is where a strap-and-shackle setup shines.
Ditch, ledge, or incline
Angles matter most when the vehicle is off-camber or nose-down. Repositioning for a safer pull angle often reduces load and helps prevent sideways stress on recovery points. Use front or rear rated recovery points to keep the line of pull as straight as possible.
Vehicle-to-vehicle assist
Care, Inspection, and Storage for Longer Service Life
Responsible off-highway use also includes protecting the places you travel. For land-use and stewardship principles, review Tread Lightly! guidance before heading out.
When to Add Complementary Recovery Gear
Featured In-Stock Picks
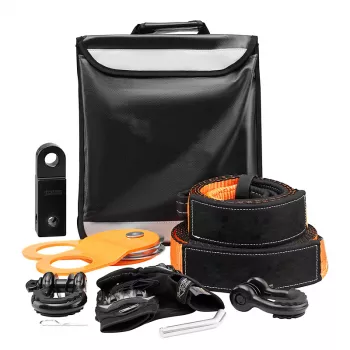
- Off-Road Winch Recovery Kit with 30,000 lbs Tow Straps and 44,092 lbs D-Ring Shackles
- Elegant Structured Crocodile Pattern Leather Shoulder Bag – Soft Texture (a structured option some drivers repurpose to keep small items organized on travel days)
- New Balance 550 Sneakers (a comfortable pair to keep in the vehicle for roadside changes or camp tasks)
FAQ
Is a 30,000 lbs tow strap enough for a full-size truck recovery?
It can be, but the strap rating is only one part of the system. The force needed depends on how deeply the vehicle is stuck, terrain resistance, pull angle, and technique—so use rated recovery points and avoid shock loads that can spike forces beyond expectations.
Can D-ring shackles be used with any bumper or hitch point?
No—use only properly rated recovery points designed for recovery loads. Avoid tow balls and thin sheet-metal tie-down points, confirm fitment, and don’t side-load the shackle with sharp angles.
How should the shackle pin be tightened for recovery pulls?
Hand-tighten the pin until fully seated, then back it off slightly if needed to make removal easier after loading. Avoid tools that over-torque the pin, and re-check after the line first comes under tension.













Leave a comment