Build a Mini Garage Workshop Diorama With Warm LEDs
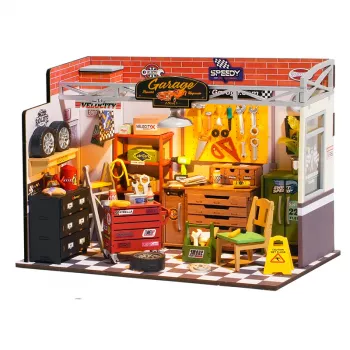
DIY Miniature Garage Workshop Craft Kit with LED Lights: Build a Lit Workbench Scene Step by Step
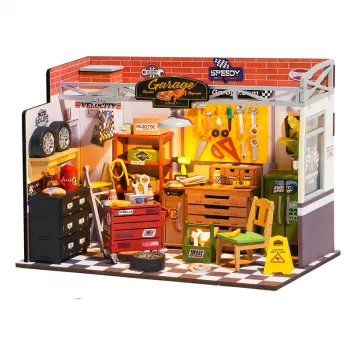
A miniature garage workshop brings together tiny tools, shelves, and a realistic workbench scene—then makes it feel alive with warm LED lighting. This style of kit is built for hands-on crafters who enjoy careful assembly, detail work, and that “lights on” payoff at the end, when the whole diorama looks like a real after-hours workspace on your bookshelf or desk.
If you’re ready to build your own, start with the DIY Miniature Garage Workshop Craft Kit with LED Lights and plan on taking it in calm, satisfying stages rather than rushing to the finish line.
What Makes a Mini Garage Workshop So Fun to Build
- A themed project with a clear final “scene,” so every step feels like it’s moving the story forward.
- Lots of small components that reward patience, straight lines, and clean glue work.
- High display value: the garage silhouette reads as realistic even from a few feet away.
- LED lights add depth and shadow—especially in the evening when the glow feels truly “workshop.”
- A relaxing, screen-free activity you can pace across a weekend or break into short sessions.
What’s Included and What to Prepare Before Starting
Most miniature garage workshop kits include pre-cut structural pieces (walls, floor, roof), printed detail sheets, miniature accessories (tools, containers, signs), and an LED lighting set. Even with a well-designed kit, having the right basics on hand makes the build cleaner and less frustrating.
Set up a clear workspace, and use a tray or small containers so tiny parts don’t wander. One of the best habits is “test-fit first”: dry-fit walls, shelves, and the workbench before glue touches anything so alignment stays crisp.
Quick Prep Checklist
| Item | Why it helps | Tip |
|---|---|---|
| Precision tweezers | Places tiny parts cleanly | Choose angled tips for tight corners |
| Craft glue | Secure assembly without bulky seams | Apply with a toothpick for control |
| Hobby knife + mat | Clean cuts and accurate trimming | Replace blades to avoid tearing |
| Small clips/clamps | Holds pieces square while drying | Use scrap card to prevent dents |
| Good lighting | Reduces mistakes on fine details | Add a desk lamp even though the kit has LEDs |
For safety and peace of mind while working with small parts and sharp tools, it’s worth reviewing the U.S. Consumer Product Safety Commission guidance—especially if younger makers will be nearby.
Assembly Flow That Keeps Everything Neat
A clean build usually comes down to sequence. If you place micro-accessories too early, you’ll bump them while installing bigger structures. If you seal the walls before thinking about wiring, you’ll end up fighting for access. This flow keeps things orderly:
- Stage 1: Sort parts by category (structure, furniture, accessories, wiring). This prevents mid-build scavenger hunts.
- Stage 2: Square the base and walls first. Check corners and edges before glue sets so the “room” stays true.
- Stage 3: Add major furniture (workbench, shelving, cabinets). These set the visual layout and determine where clutter can live.
- Stage 4: Install LED wiring while access is open. Avoid trapping wires behind fixed panels.
- Stage 5: Place the smallest details last (tools, jars, signage). This protects delicate pieces from accidental knocks.
- Final pass: remove glue strings, straighten leaning items, and touch up visible edges for a crisp finish.
LED Lighting: Placement, Power, and a More Realistic Glow
The lighting is what transforms a mini garage from “cute” to “convincing.” Aim for the same logic a real garage would use: a general overhead glow plus a more focused area near the workbench.
- Place lights with intention: overhead for overall illumination, and slightly closer to the workbench to spotlight the “action zone.”
- Hide wires: run them along corners, behind shelving, or under trim pieces so the eye stays on the scene.
- Secure gently: tiny tape strips or small glue dabs work well; avoid saturating LED contacts.
- Test early: check connections and polarity before final sealing so troubleshooting is simple.
- Avoid hotspots: an even glow looks more like a real shop than a harsh, concentrated beam.
For additional background on LED basics and safety considerations, UL Solutions provides a helpful overview here: UL Solutions – LED Lighting (Safety and Basics).
Detailing Ideas to Make the Scene Feel Lived-In
The difference between a neatly assembled miniature and a scene that feels “inhabited” is usually subtle. A few small choices can add realism without turning the display into clutter.
Who This Kit Suits (and When to Choose a Simpler Build)
Care, Display, and Long-Term Enjoyment
More In-Stock Picks to Round Out Your Craft Setup
- DIY Miniature Garage Workshop Craft Kit with LED Lights — the centerpiece build with a finished, lit display.
- Birkenstock Women’s Black Suede Slippers for Fall/Winter Comfort — comfortable footing for longer crafting sessions.
- Cute Apple House Kitten Plush – Soft Detachable Cat Plush Toy — a cute desk companion while you assemble tiny parts.
FAQ
How long does it take to build a miniature garage workshop kit?
Most builders finish in about 6–12 hours total, depending on experience, drying time, and how much extra detailing you add. Splitting the work into short sessions (structure one day, lighting and accessories the next) keeps it enjoyable and neat.
Do the LED lights come pre-wired or need assembly?
LED components typically need basic placement and simple connections rather than being fully pre-installed. Test the lights before final assembly, then route and hide wires along corners or behind shelves for the cleanest look.
What tools are most helpful for clean miniature assembly?
Tweezers, craft glue used sparingly, a sharp hobby knife with a cutting mat, and small clips/clamps make a big difference in precision. Good task lighting also helps reduce mistakes, and blades/small parts should be handled with care.













Leave a comment